
An Introduction to Digital Beetography
Zachary Huang
Michigan State University
1. Equipment: know your camera
Before buying a camera, I encourage you to “study” the camera by reading reviews (http://www.dpreviews.com), see sample photos, and then hand it (if possible). If you already have one, then definitely study the manual and change settings and observe different results.
It is necessary to have a dSLR (digital single reflex lens) camera? Yes, if you are serious with digital photography. dSLR will allow you to switch lens for different situations, and in most cases you will be shooting using a “macro” (Nikon calls theirs “micro”) lens. A macro lens allows you to focus very close to the subject, thus have a larger image on the CCD or CMOS (the sensor for the digital camera). A cheap camera body nowadays can be had for $5-6 hundred dollars, a good macro lens will cost about another 4-5 hundred.
The advantage for a dSLR vs a point and shoot (PS) camera is that it is much more responsive — most PS cameras wait for half a second before taking the photo, while dSLRs usually has a delay of about 60 miniseconds.
Table 1. Three cameras I have used in the past.
| Olympus D4501 | Nikon CP 990 | Nikon D70 | |
| Pixels | 1.3 meg | 3.2 meg | 6.0 meg |
| Amount paid (time) | $599 (Oct 1999) | $720 (Apr 2001) | $999 (Mar 2004) |
| Shutter delay (sec) | 1 | 0.6 | 0.06 |
| Recording time | 4 sec | 4 sec | 3 frames/sec |
| Control of exposure | auto only | P, A, S, M | P, A, S, M |
| Sensor size | 5.3 x 4 mm | 7.144 x 5.358 mm | 23.7 x 15.6 mm |
Currently there are much faster PS cameras in the market, some similar to the D70, due to fact that they use electronic shutters (essentially there is no mechanic door that opens, but rather a charge makes the CCD available to respond to light when it is supposed to “open”).
PS camera can also take ok photos if you have enough patience, or if you are lucky. But you probably settle for static bees on flowers and it is difficult to capture a bee in flight, if nearly impossible.
My current camera is D700 which has a “full size” (i.e.= the same size of film negatives) sensor. The larger the sensor, the less noise and better color rendition due to less interference among the tiny sensors and also less heat produced.
2. Light/exposure control
2.1 Shutter speed (S) : higher number means faster speed because is presented as inverse number: 100 means 1/100 of a sec, and 500 means 1/500. Higher speed means the shutter is open for a shorter amount of time, thus allowing in less light. Higher speed will freeze motion while lower speed will create motion blur. If used correctly, motion blur can impart a sense of movement and can be good for the photo. Shutter priority mode (i.e. the user picks a shutter speed, and the camera calculates the aperture automatically), is denoted as S in Nikon cameras and Tv in Canon cameras. Wiki has more examples of how various shutter speeds affect photo effects.
2.2 Aperture (A): Aperture size (F) is again a reversed number, so a larger number means a smaller opening of the lens’s “pupil”, thus allowing less light. For example F22 will let in half of the light compared to the next number, which is F16. F16 takes 50% light of F11, etc. Aperture priority mode (i.e. the user picks a aperture size, and the camera calculates the shutter speed automatically), is denoted as A in Nikon cameras and Av in Canon cameras. For a more technical treatment of F-number, see wiki.
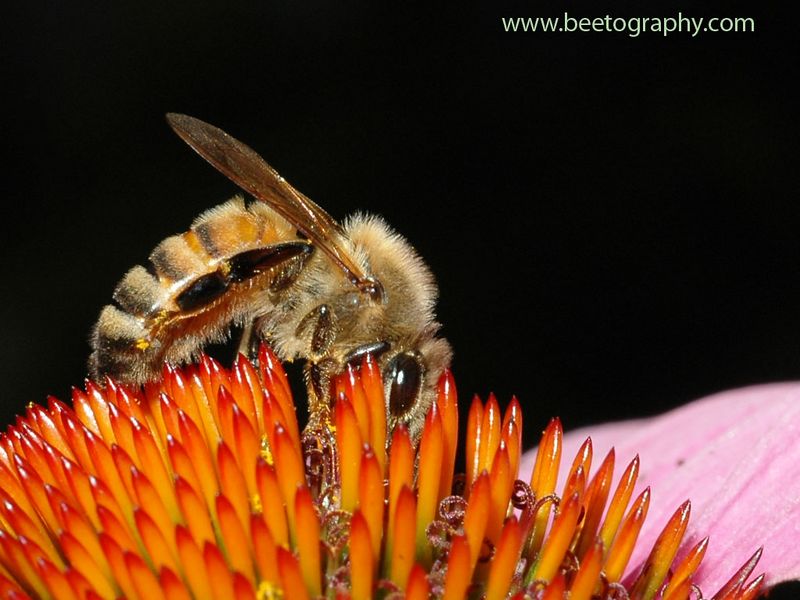
2.3 Flash: Flash can be used to add or replace sun light. This is often required for very closeup macro shots. The reason for this is often you want to have a greater depth of field (to have the bee showing more body parts in focus, not just part of the wings), say F22, and at 1/250, there is not enough sun light to illuminate the subject. A flash, whether an internal one or external one, can serve this purpose. Most of my D70 photos were taken in using the onboard flash, which if used correctly, can create a black background, showing a cleaner subject in the photo. Currently I use two wireless flashes (Nikon’s R1C1) which attaches to the front of the lens and I have more control of the aperture in the M mode (manual, which means I control both the shutter and aperture).
Example of darkened background using internal flash. A bee on a coneflower. 1/500, F22, onboard flash, Nikkor 60 mm micro, D70, 9/16/2004.
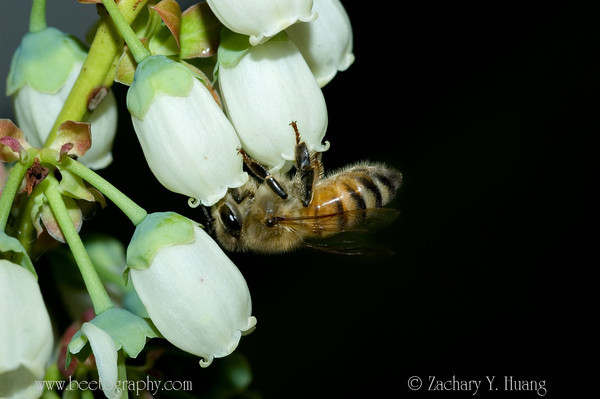
2.4 Depth of field: Larger aperture (smaller F number) will have smaller depth of field and only the area in focus will be clear, while these in front or behind will be out of focus. If used correctly, out of focus areas creates a dream like feeling, called “bokeh” and can be pleasing to the eye. Aperture priority mode (i.e. the user picks an aperture, and the camera calculates the shutter speed automatically), is donated as A in Nikon cameras and Av in Canon cameras.
Small aperture shows a bee and parts of a flower totally clear. More academic.
A bee on blueberry. 1/500, F22, Nikon D70, 60mm micro + Flash, 5/30/2006.
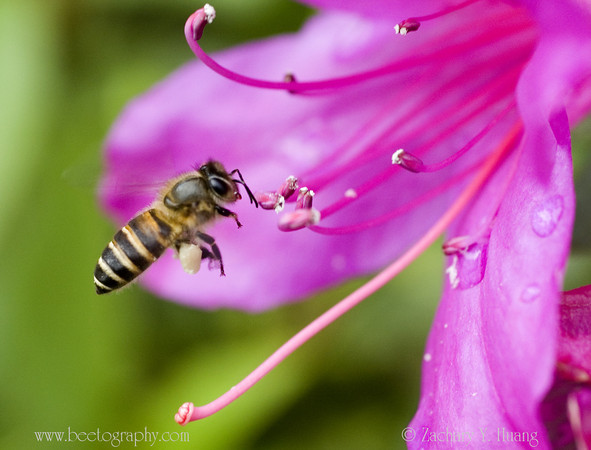
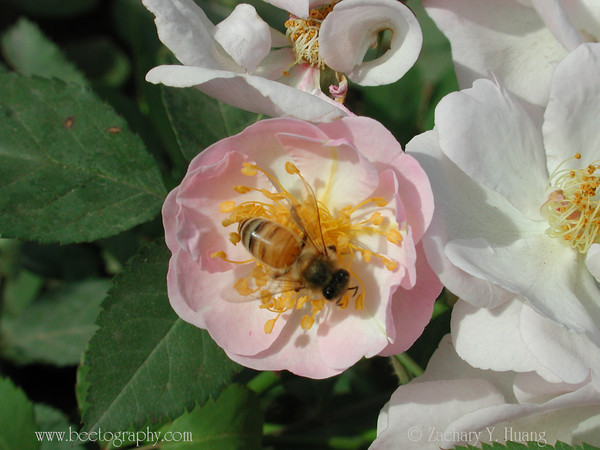
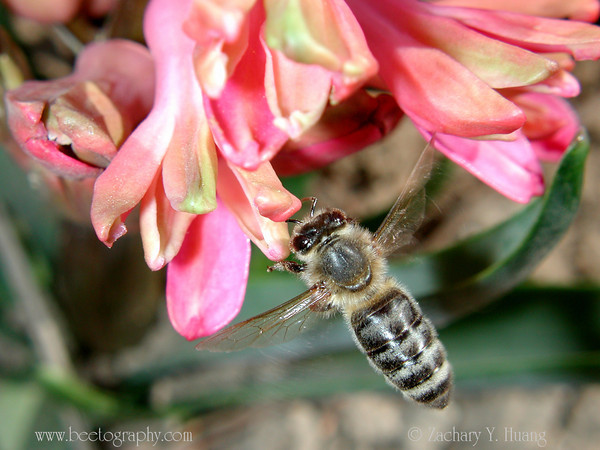
Large aperture (F5.6) shows only parts of bee and flower in focus. More artistic.
A Asian honey bee Apis cerana on rhododendron. 1/250, F5.6, Nikon D70, 60mm micro + Flash, 3/27/2006, Taiwan.
2.5 Color: Color is rarely controlled for digital photos because you can do all the adjustments afterwards using Photoshop or other software. White balance can be highly important though if you want to natural colors of the flowers. Most dSLRs have choices of white balance (sunlight, flash, fluorescent light, preset, etc), while most PS cameras do not have it.
2.6 ISO. In the old days you would need to bring at least two types of films, one for the indoor (darker, perhaps ISO400 film) and one for the outdoor photos (brighter, ISO100). Now with digital cameras all you do is to change it via a dial. Lower ISOs always give you a better, less noisy photo. But when there is not enough light and you do not want to use flash (e.g. in a performance), then you dial up the sensitivity to a higher ISO (e.g. 1600). This will yield a more grainy photo but you still captured something. Professional cameras will have usable photos at this high an ISO, but small PS cameras usually lose quality for anything higher than ISO400. For shooting flowers and honey bees, usually you try to shoot at the lowest ISO.
3. JPEG or Raw?
Some newer PS cameras now also have the option to shoot “raw” — which means a pixel by pixel dump of the information to a file, while nearly all dSRLs have this option. Jpeg is a compressed file so you will need to specify “basic, normal or fine” which adjusts for the different degrees of compression. “Fine” will create a larger file with more details, while “basic” will allow you to have more photos on a memory card while sacrificing some details. The main advantage of RAW is that you have the ability to change white balance after the photo is taken, whereas in JPEG, if white balance was set incorrectly, it would be difficult, if not impossible to recreate the original colors during post processing. I now shoot in mostly raw for flowers and bees. Raw also give you as light edge in the dynamic range (the contrast between light and dark areas in a photo).
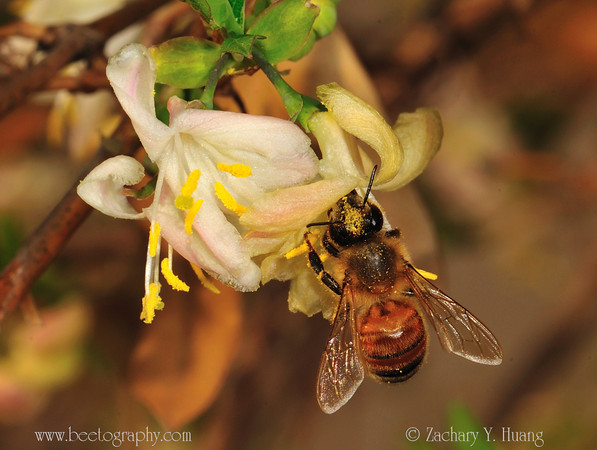
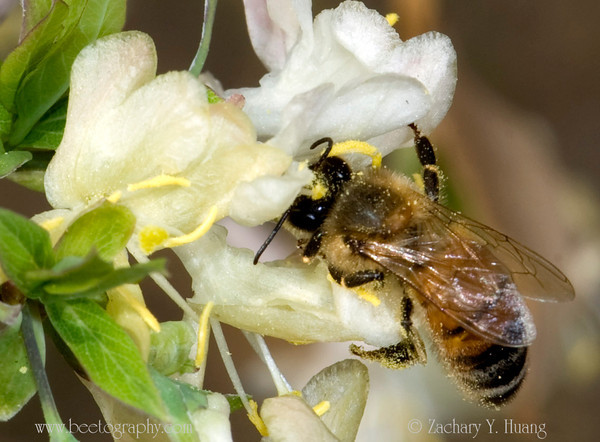
3.1. Example of a honeysuckle that has a yellowish tint due to a wrong setting of white balance. Somehow suing “flash” was not as good as “sunny”. 1/250, F25, Nikon D700, 105mm micro, 2 wireless flashes (R1C1), 3/20/2012, MSU Campus.
3.2. This can be corrected if shot in raw mode, by changing it to the correct white balance. This one is in more natural colors. 1/250, F20, Nikon D700, 105mm micro, 2 wireless flashes (R1C1), 3/20/2012,MSU Campus..
4. Composition: The 1/3 rule
It is not always good to put your subject in the center, which can be perceived as boring or conservative. The best way is to set the subject (the focus of your story) at 1/3 off one side, then from the bottom or top.
Example of a bee at 1/3 of the frame
5. More examples of photos
In the following I use some examples to illustrate some other points in honey bee photography.
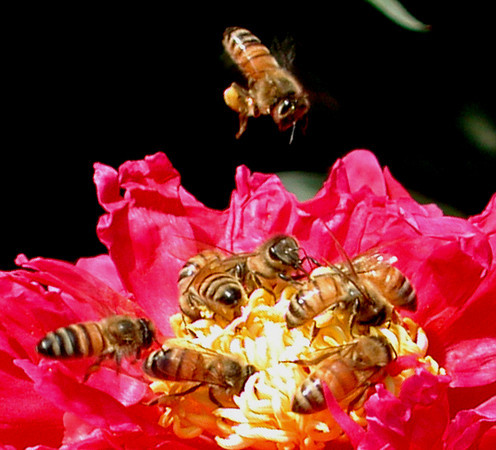
5.1. Proximity of lowers and bee hives can help. I have not seen bees work on my peonies in Michigan though, even when there is a bee hive in my backyard though. It might also have something to do with season (what are other competing flowers?).
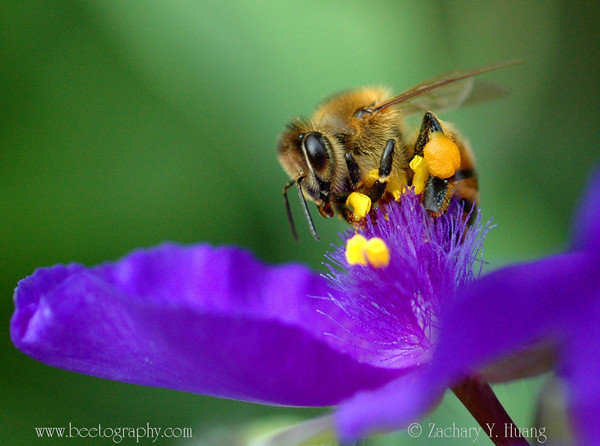
5.2. Side view of a bee is usually more pleasing than looking at her back straight down.
This is a top view of a bee:
side view.

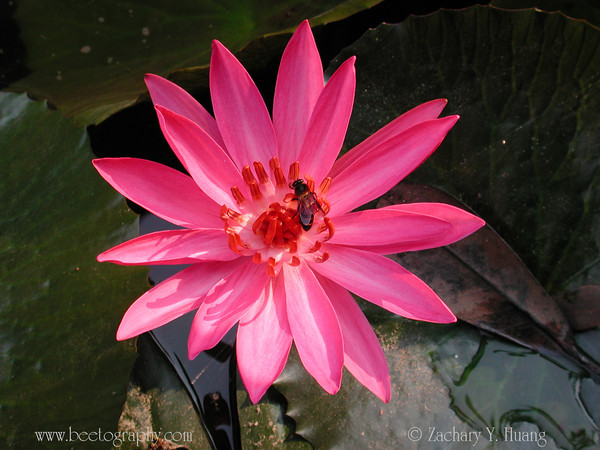
5.3. Patience….I waited for the bee to come to this water lily near the shore because my Nikon CP990 had a very small zoom. 1/90, F5, 4/21/2002.
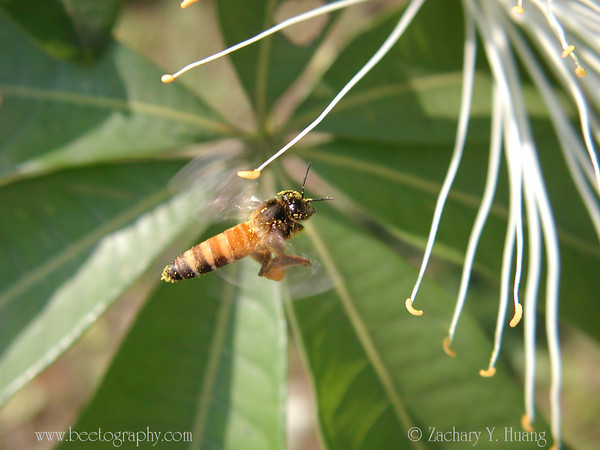
5.4. Luck, we all need it sometime…I got frustrated after trying to take bees in flight due to the 0.6 sec shutter delay. Then I started to shoot randomly and got this one in flight. 1/280, F6.2, 3/26/2002.
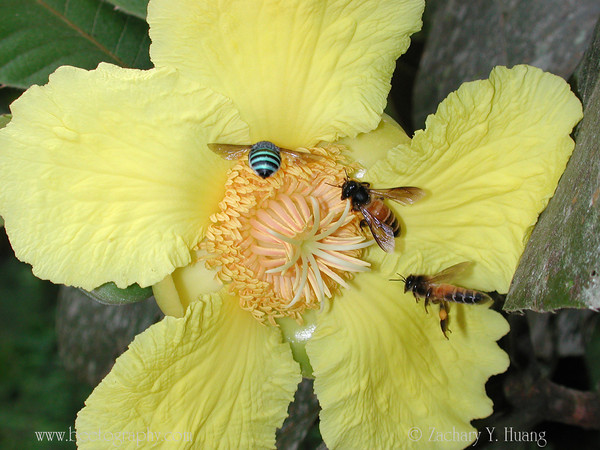
5.5. These bees (one anthophoridae and 2 APis dorsata) came after I was shooting this Dellenia flower (Dillenia turbinata, Dilleniaceae). while jogging with my camera at 6 am.
5.6. Sometimes the bee hovers so much that you can capture even using a PS camera. A giant honey bee foraging on Picara spp (Bombacaceae). 1/1000, F2.5, 4/5/2002.
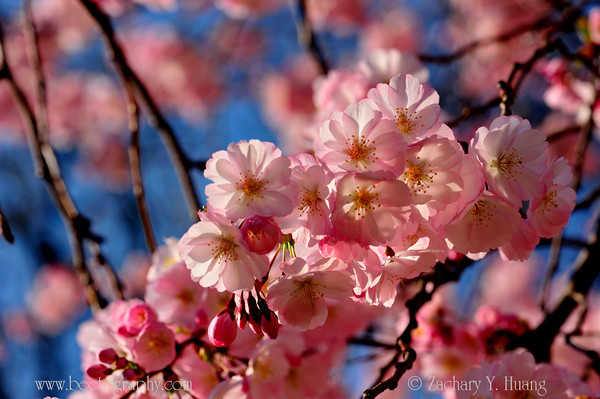
5.7. Cherries blooming a few days back (March 21, 2012). I used back light to make the flowers translucent…for more photos of bees on cherry blossoms, see cherry and bees.
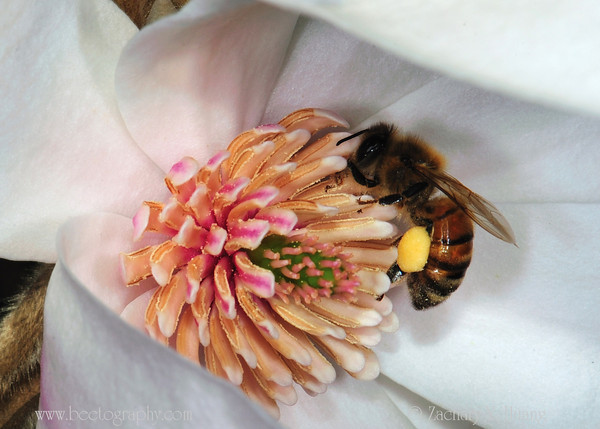
5.8. That same day I saw bees working on magnolia! for more photos see bees on magnolia.
Thank you.
Amazing article, very informative.
Look forward to reading some more of your posts
Thanks
nice photoss
My facebook